![]() To remove scratches and
blemishes from a photo, select the Touch Up Tool on the Wizard Panel. You can choose from two options: Auto
Fix and Touch Up Brush.
To remove scratches and
blemishes from a photo, select the Touch Up Tool on the Wizard Panel. You can choose from two options: Auto
Fix and Touch Up Brush.
Auto-Fix: If you have small dust spots and scratches throughout your image, try the Auto-Fix button. This will slightly blur high-contrast areas to remove small flaws
You can click this button several times in a row to increasingly blend the flaws, but be careful not to make your whole image too blurry.

Image before Auto-Fix

Image after Auto-Fix
The Touch Up Brush: The Touch Up Brush allows you to paint over flaws in your image by using a selected flawless area as the paint.
First, select a clean area of your image to use as the paint pattern. Click once on the Current Pattern preview box to enter the selection mode, and then trace a rectangle around the area of your image you would like to use as your paint pattern. In most cases it's best to use a small selection similar in shade and color to the problem area.
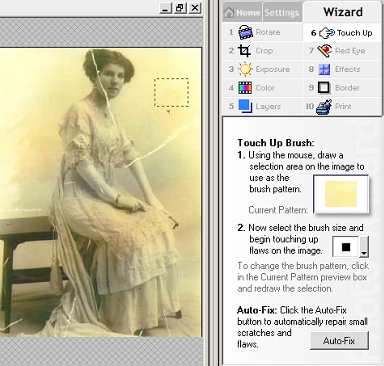
Selecting a paint pattern with the Touch Up Brush
Next, choose a brush size, and then paint over the scratch or blemish by clicking on it with your mouse and dragging. Continue to choose small, clean portions of the image and paint over the flaw. It might help to zoom in on the area.
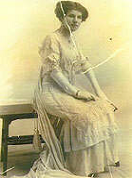
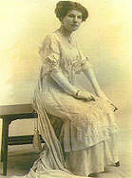
Image Before Touch Up Image After Touch Up
The Touch Up Brush can also be used to completely remove objects (or people) from a photo. Just select small paint pattern areas from your background, such as the grass, blue sky, or water in the photo below, then paint over the undesired object.
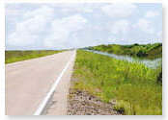
Image Before Touch Up Image After Touch Up